
DIY collapsible dice trays
I’m about to start playing DnD again for the first time in 12 years, with a group of people I only recently met. I’ll be honest, I’m a little nervous.
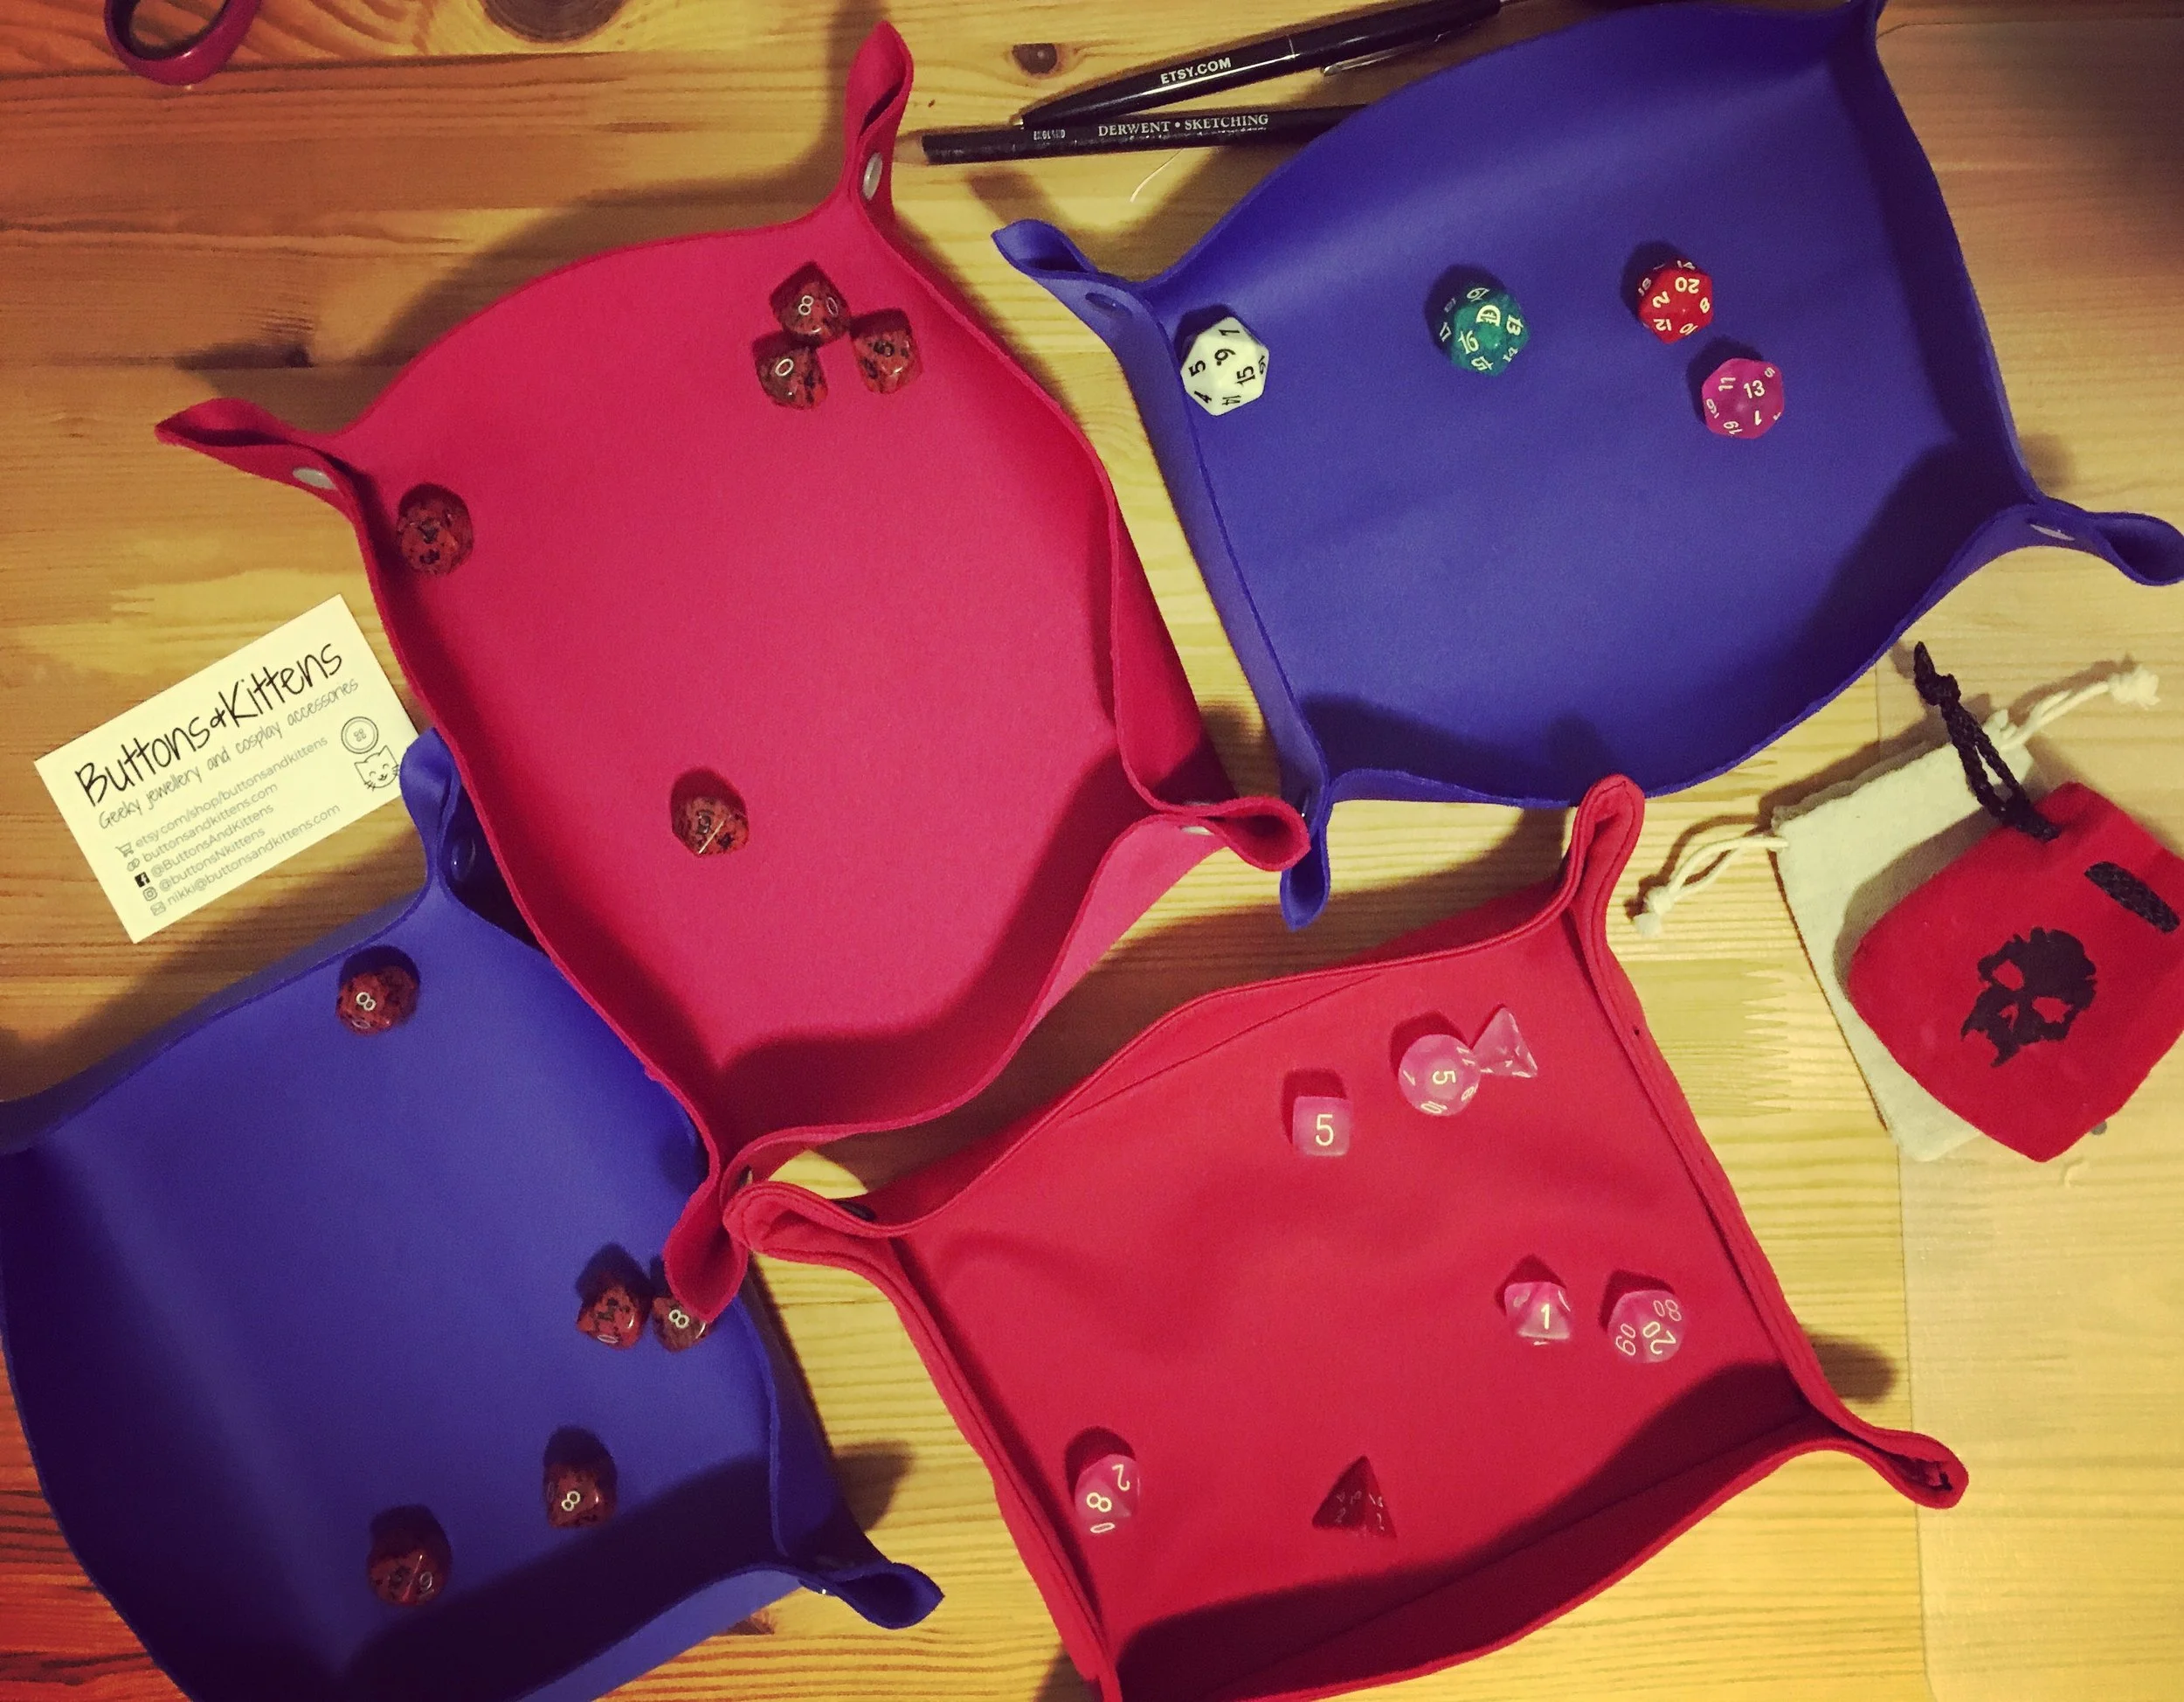
So instead of preparing my character sheet and reading the new Player’s Handbook, I spent yesterday afternoon making myself and some of the group members collapsible dice trays!

Collapsible dice trays for everyone!
The basic ones are really simple to make, assuming you have a snap press. Take a rectangle of thick scuba knit fabric, roughly the size of the Handbook, and insert your snaps in each corner, roughly an inch in from the corner and half an inch down. (tips for inserting snaps and snap placement near the end)

snap placement on collapsible fabric dice tray.
The important part here is the fabric. The dark pink and purple scuba knit I have is about as thick as a light wetsuit. Scuba knit is good because it’s usually thick and maintains its shape. The fabric is also very smooth, so it won’t hinder the dice roll. Plus, being a knit fabric, you don't have to worry about fraying edges as much! (Read more about scuba knit at Sewing Bee Fabrics or Croft Mill Fabric - I have no association with either, I just like the way they describe scuba knit).
Heavyweight felt or thick-ish craft foam would work too, but you would need to be careful not to let them get crushed in transit, which can be a pain.
If you don’t have a thick and sturdy fabric, you can sew several layers together instead. One of the group members wanted red with black studs, but the red scuba knit I had is pretty thin, barely thicker than swimsuit fabric, and he has metal dice, so his tray needs to be the most protective of all of them.
With this in mind, I cut out three rectangles: 2x 11”x9” and 1x 6”x8” (the note in the picture says 11”x8.5” but it was a lot wider, and I trimmed it down to 9). I usually work in metric but I was using a quilting ruler, so those were the sizes that seemed right for this purpose. Basically you want your main pieces to be about 3” wider and taller than your base, so you’ve got 1.5” for your sides and seam allowance.

The pattern pieces: 2x 11"x9" and 1x 6"x8"
Place the base piece in the middle of one of your outer layers and topstitch in place. If there is a right side and a wrong side to your fabric, you should be preparing this step wrong-sides together. Scuba knit can be a bit slippery when sewn to itself, so if you have some water-soluble adhesive (or even a glue stick), this would be a good time to use it, so it doesn't slide out of place while you're sewing. If you don't have a suitable adhesive, pin it in place with sharp pins before you topstitch. Note that your bobbin thread will be the innermost rectangle of visible stitching on the bottom of the tray, so choose an appropriate colour.
Sewing note: Sharp pins are important with scuba knit; you don't want it to catch on the fabric, or it could cause runs which will later ruin the smooth surface of the fabric and hinder the dice roll. That said, don't be afraid of sewing with scuba knit. It's a very forgiving fabric, as it's a double-knit like a ponte, and you can usually treat it like a woven fabric - for this project I used only a universal needle with a standard straight stitch, unless you count the overlocker - and the overlocker wasn't necessary, I just like using it.

Base layer on top of an outer piece prior to topstitching in place, wrong sides together.
Layer your pieces so the base layer is on top. This is so that the base layer will get sandwiched between the two outer layers later when you flip it right-way-out.
Notch the centre fold lines of both your outer layers and line them up (especially important in you just eyeballed the cutting step!). When determining the centre of the pattern piece with the base layer attached, use the centre-point of the base layer, not the outer fabric. Even if you didn't just eyeball the cutting step, this is still a good idea, as the base layer might have shifted during sewing.
Once it's all lined up, pin the layers together. You can pin them at the edges instead of the middle if you'd prefer - I used an overlocker at the next step, so I like to keep my pins well away from the cutting blade edge, just in case!

Notches help you check that the two outer pieces will line up and keep the base piece exactly centred between the two.
You can see in the next pic that my edges were quite rough - the left edge was the edge from when I bought it - but that didn't matter for me because I was going to use my overlocker and trim the edges off anyway. Even though this scuba knit was relatively thin, it still keep its body well, so I needed the overlocked edge to help keep it all together once it was flipped right-way-out.

Lining up the two outer pieces, right sides together.
The next step (not pictured) is to sew/overlock the outside edges together, leaving a gap through which to turn it inside out. Don't forget to clip your corners (I forgot to do that and it shows!).
Once it's turned inside out, your base layer should be completely hidden, only the bobbin stitch from earlier showing as topstitching on one side. This side will become the bottom of your tray.

Don't forget to leave a hole to turn it through!
Once you've turned it right-side-out, you'll probably notice just how well scuba knit keeps its shape, because you'll probably have what appears to be a flat pillow. Poke the corners out with your preferred poking stick, then press it flat, taking care to really flatten the edges. When you come to your turning-hole, make sure you're pressing it so that the raw edges are completely encased and will be closed when you topstitch at the next step.

To keep those edges flat and close the turning-hole, topstitch as close as you can to the edges of the fabric. You can either pivot in the corners or try to follow them around. As you can see, I used both and the pivot worked best for me, as I was losing my concentration at this stage (just before dinner - I was hungry!).
Once you've got the edges topstitched, flip it so the bottom of the tray is facing up and topstitch around the outside of the base layer, so its raw edge is between the two rows of topstitching. This will help the edges fold up nicely into sides. The bobbin stitch at this step will be visible on the inside of your tray.

Now that the sewing part is done, it's time to insert the snaps. Rather than lining up exactly with the right angle of the base stitching, the holes you punch for the snaps should be set in the width of the radius of the snap, so that the edge of the snap forms the vertical edge of that corner. Don't try to just shove the cap needle through the fabric - prepare the way with a pilot hole first, just as you would/should when drilling a screw. Your snap press should come with an awl for this purpose. If you don't have an awl, try pushing the thickest sewing needle you have through the fabric, then widen the hole with a skewer or thin knitting needle.
When inserting your snaps, the caps should be on the side with two rows of stitching around the middle/base, and the studs/sockets should be on the side with only one row of stitching around the middle/base. Keep the stud on the left and the socket on the right of each pair and you will also be able to fold the mat in half and snap it shut that way too.

Once your snaps are in place, snap them together and test it out!

You can of course use other types of snaps/press studs, buttons, or velcro. I've heard of people using magnets, but I'm not sure how well that would hold up against heavy dice or an aggressive dice roll.
You can also use other fabric and cushioning layers. Make sure that the layer on the inside of the tray is smooth, so the dice can roll unhindered (until the hit the sides). If you're using interfacing, avoid the edges of the base, as interfacing along those edges would prevent it from folding up as nicely.
Now that I've made the prototype and I know which areas to fix/be more careful with next time, I'll make some more and sell them on my Etsy store. So if all of the above looks like a little too much work, or you can't find the right fabric/snaps/your sewing machine just broke, send me an email or check out the store!
If you do use this tutorial, or draw inspiration from it, I'd love to see your trays! Email me a pic/link, or tag Buttons and Kittens on social media:
Facebook: @ButtonsAndKittens
Instagram: @buttonsNkittens
Twitter: @ButtonsNKittens
Thanks for reading and see you next time!
